Q for all you would be tilers out there...

Hi Folks.

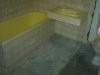
I'm about to tile a bathroom floor. It's an older place with a cement slab as the substrate and I've removed all the existing mortar and tiles from the floor etc.

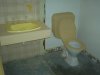
The only drainage point in the bathroom is in the shower alcove and I'm wondering basically if there is a standard gradient that should be used when screeding the mortar bed?

Or..... are the falls used only in the shower alcove and the rest of the bathroom better off just leveled?


Thanks (as I've got no idea with this stuff)....
ArJay:)
 
Normally only in the shower cubical, but if your shower rose is facing the door you should be able to have a slight fall back in towards the shower.
Don't get carried away with the fall it should be barely noticable, say 10mm over 900mm, small tiles are easier but if their larger than 100mm cut them diagonally around the drain + file the edges.
I myself prefer a shower base $120 cut a rebate into the wall around the bottom edge and use aqua panelling straight onto the walls, it's the best thing since sliced bread, whole shower done for under $450 bucks.
 
Thanks emu..

Thats handy info...couple more questions for ya.

There's no drainage point in the bathroom aside from the shower...is this normal?

Also while I'm picking ur brains, I've knocked the used to be wall between the toilet and the rest of the bathroom in order to open up the space a bit more. If I use the mortar bed near the toilet outlet is there an easy way to join up the dunny if it's now sitting 30 odd mm higher than it was previously? (it was just sitting on tiles layed straight on the slab).

Thanks heaps for your time..

ArJay:)
 
Drainage points in bathrooms changed over the years, some councils still require them if you have an open shower or a laundry (washing machine) in the same room, or it's upstairs.
If the outlet from your toilet is through the floor it will have a 'o' ring to seal the joint, the pipes just overlap ,you can get extensions for this if need be.
If it's through the wall unless you can raise exsisting pipes, just support the toilet in the fininshed position and grout up underneath,grout is just sand cement and addatives which make it turn rock hard,you mix it dry with a tiny bit of water, just enough to change colour, then pack it in tight with a bit of wood and round it off.
You can get coloured grout.
Hope this helps
 
Thanks so much emu... really helpful.

The outlet is thru the floor so I guess I'll look into getting an extension if the mortar bed is going to be too high for the existing setup.

Hope you don't mind mate but I'm gonna slug you with a couple more questions if that's ok. (don't really know anyone who has any clue about this stuff...)

When I pulled up the mortar and tiles in the shower alcove I was suprised to find that it had been layed directly onto the cement slab with no membrane or any kind of barrier to speak of...is this normal?

What would you recommend as far as relaying the shower floor? Some of the info I've been reading recommends a preslope mortar bed before the membrane and others don't....do you have any suggestions? I'm pretty confused...

Again, thanks so much for your time. Really appreciated...

ArJay :)
 
What type of membrane sheet or liquid?
Is there a recess (step) in the shower entrance?
Are the walls framed with timber or brick?
Was there any type of flashing around the bottom edge of shower?

There's a lot of showers around the same as yours, most will bond to the floor but if they don't bond properly to the floor they will eventually lift and the water will get in and rot out whatever it can, usually most people wont detect it until the tiles start falling off or the wall starts moving which is usually the case.
If you can answer the above ? it will save me some typing.
 
Ok...went and got some advice from one of the sales guys at the place where I got the tiles from. He recommended using ABA Superflex as a sealant membrane after all the screeding and falls has been done. Also supplied some porous flashing type sheet for the corners and coving etc to be painted on with the Superflex. Does this sound around the mark?

There was no flashing previously around the edge of the shower as all....

Going to be tiling on top of the existing tiles on the wall. He also said to paint the membrane onto the walls as well as the floor prior to tiling.

At the moment there is (and was) no curbing or recess what so ever between the shower and the rest of the bathroom. I'll have to put a slight fall from the rest of the bathroom toward the shower I'm guessing...

Am I on the right track here?

ArJay :)
 
It sounds like your confidence is building, and your on the right track.
Just make sure the walls arn't already damaged.
Ok the flashing will need to sit up about 100mm up the wall from the base ( before render) and you can seal the bottom crn before rendering, and then after the render has cured.
The idea is to make sure there is no water ingress between the flashing and render, and seal around the plumbing fittings.
And use a compatable tile adheasive to stick to the membrane.
I haven't been involved with placing a membrane over exsisting tiles and then tileing over the top, i'm just concerned about how strong the bond will be between exsisting tiles and the membrane ( sticking to a smooth ceramic surface)
But mind you i'm behind the times as far as adheasives go, if theres any dramas just stick a stone in the grinder and take off some of the glazing.
Don't forget to use sillicon between the floor and wall tiles along the bottom edge, if you use grout it will crack and eventually store water.
You can have a fall throughout the room if you want , i think just about every kid at some stage places a flannel over the drain to try and make a pool, i did and still remember the bruise i received from the old girl.:eek:
Anyway good luck with your project Arjay
 
emu said:
You can have a fall throughout the room if you want , i think just about every kid at some stage places a flannel over the drain to try and make a pool, i did and still remember the bruise i received from the old girl.:eek:

LOL...:D

Cheers for all the pointers emu. Really very appreciated....I'm gonna tackle most if it next weekend when I have some extra time off.

Here's a few before pics if ur interested. Plans are to replace the vanity, toilet and re-enamel the bath. Not much of a yellow and beige man myself.... :)

You can see in the first and third pics where the wall between the toilet and the bathroom used to be. Had a very unfashionable 70's hung ceiling which had to come down as well.

Thanks again.

ArJay :)
 

Attachments

  • Bath and Vanity Before.jpg
    Bath and Vanity Before.jpg
    62.7 KB · Views: 176
  • Shower Alcove Before.jpg
    Shower Alcove Before.jpg
    74.7 KB · Views: 184
  • Toilet Before.jpg
    Toilet Before.jpg
    57.4 KB · Views: 262
No flashing or membrane

ArJay said:
When I pulled up the mortar and tiles in the shower alcove I was suprised to find that it had been layed directly onto the cement slab with no membrane or any kind of barrier to speak of...is this normal?
I just experienced the same thing yesterday. Problem was tiles outside the shower in granny flat were lifting and the grout was water logged. Dad came over to help - pulled off door architrave and found rotten, water logged bottom plate, pulled off bottom two rows of shower tiles, some FC sheeting and floor tiles and found that the shower was constructed without any flashing or membrane. Water had constantly leaked into the bottom plate over many years (I've been there for 10 yrs now).

Solution. I'm about to hammer drill all floor tiles off and remove bottom two rows of wall tiles. Take off FC sheeting on this portion. Replace bottom plate as necessary. Install FC sheeting as necessary. Screed concrete to shower floor for new fall. Install membrane (not sure what type yet). Retile floor and walls. Voila. Shower is fixed for many years to come.

Lucky my dad is helping :)

Oh, and I don't have a floor waste outside the shower either. I don't see this as a problem as there is a hob separating the area and the vanity has an overflow hole, so hopefully this area will never have a considerable amount of water on it.
 
If there is no floor waste and the bathroom has a walk in shower, I raise the outer edge of the tiles at the doorway by about 3mm.
My preferred waterproofing membrane Davco k10 .

Gerd
 
Ok so progress so far...

1. Removed old toilet cistern and pan and hacksawed out the flange (wrong height).

2. Keyed (with hammer and cold chisel) and cleaned slab.

3. Screeded and levelled floor and installed puddle flange in shower.
The first time I've ever done this and was a lot more work than I envisioned. Not really a single person job I found out. Because the mortar sets rather quickly you pretty much have to get it right the first time and there's no stopping for any tomfoolery during the process. WAY underestemated the amount of sand and cement needed (by half) for the job and had to race to Bunnings (on a Sat :eek: ) to get more supplies. Had to be quick cause you don't want a dry join in the mortar which will cause cracking.

All in all was damn hard work and my back was rooted by the end of the day. A whole lot of bending, shovelling, and mixing involved.

The puddle flange was a bit tricky cause the shower drain was one of the old school style made out of lead! Had to make up my own funky adapter to make it fit properly...

4. Primed, prepped and waterproofed shower alcove. Used (Ardex) ABA Superflex 1 Part. Pretty easy to apply, just bought a cheap paintbrush. Used silicon and polyester sheeting in the coving and corners etc as explained in the spec sheet.

5. Found that there was a small depression in part of the floor that I missed with the screeding. After some advice from the tile shop and others, I used a sloppy mix of thinset and screeded the low spot with a straight edge.

Now just waiting for that to dry and hopefully tonight I can actually do some tiling!

Jindaro, that shower recess sounds nightmarish...luckily mine wasn't quite that far gone. Good luck!!!

ArJay:)
 
Back
Top