2nd duplex reno from A to Z

I'm reading too Celeste!! :D

You amaze me!! What a challenge you've taken on! Can't wait to see the after photos!

Have you had any success yet with the sale of the first duplex? If the market is flat - have you thought of keeping it and renting it out? Or waiting until the 2nd one is finished to sell them as a pair? By the way - was that a Crea benchtop you used in Duplex #1? Looks just like ours!!

Cheers,
Jen

Yep it's Crea, Butterum I think. I did say we have similiar tastes!!!:D

I may have a buyer, I should say my REA may have one.She is looking to buy for her mother and she loves it, she needs to sell a property in QLD 1st. Last I heard she was talking to her broker.

Tho, she did say, if I miss out on this one I will probably buy next door.:D

So fingers crossed. I have been tossing around keeping and renting out, need to check with the account all the pros and cons due to my business set up. Tho hubby will be happier with the LOC paid out.

Update, Bathroom already to start tiling.

wardrobes and kitchen cabinets arrived friday, Wardrobe and draws all assembled in bed 3. I had to patch the wall where the electrcian busted thru moving my power point. Note: this happened next door as well, remember to paint the wall behind the kitchen last.

Kitchen - nearly finished the patching, final touch up coat romorrow. Then I can start painting and then assemble kitchen cabinets. The plumber and electrician leave big holes everywhere!!!:eek::(

Bed 2 needs 2nd coat - tomorrow and then I need to assemble the wardrobe.

I have been pottering around outside as well, weeding and clearing junk.

I'II try and remember to do some photos.

The back yard of duplex 1 looks really pretty at the mo. because the peach and nectarine trees are all greened up and full of blossoms.

more later.
 
Hi all

It's been a while, I have been hard at it, I want 3 mths off at Xmas.

Bathroom all tiled took me a week!! :eek:, 2 bedrooms finished, moved all my junk around and cleaning up a little (the plumber and electrcican left lots of rubble) so now I can work freely in the main bed and kitchen.

Started painting all the windows in the kitchen / lounge room. Start on the walls etc on Monday, so I should start installing all the kitchen cabinets this week, after I put them all together!!

Whilst I am doing that I will be working outside in the mornings, as its starting to warm up here - so outside mornings/inside in the arvo. I will be sanding priming / painting the gutters/fascia/walls/windows out the back and painting the fences. Oh and some gardening - limestone wall and retic.

Carport going up thursday.
 
I have been hard at it, I want 3 mths off at Xmas.
You're not wrong!!! (re being hard at it) and you deserve the time off.

Are you getting much help with the work aside from the tradies?

Glad to see it moving along nicely although it probably seems to be dragging from your side.

Regards
Marty
 
Hi guys

Thanks for the feed back.

I'm all by myself, only tradies so far plumber / electrician / bobcat. I have a tiler booked for the laundry, I hate cutting around a toilet!!:D

Hubby does come out occassionally and in winter when aircon is quiet, he had a couple of the guys come and help, mainly grung work - loading the skip, putting the new colourbond on the patio, shifting dirt, that sort of thing.

He pops out once a fortnight and mows the lawn on the one for sale.

I will have some photos - if I remember in time :eek::confused: on Monday:D

going to a barbie now to hear about my neighbours trip to libia. Tomorrow BIG DAY on THE GREEN - 36 degress in the sun drinking wine:eek: No kids, just friends Excellant.!!
 
Hi Celeste....wow....you have done so much. I am so impressed with your handy work. I bought myself a chordless drill yesterday...so I'm interested in hearing about the tools you use and how you use them. Liked the tip about the sponge sander...so I took your advice and got myself one of those...many thanks...tis great.
 
Hi all

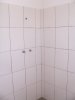
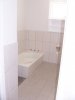
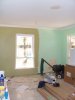
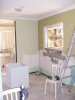
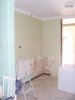
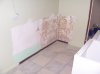
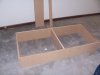
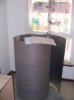
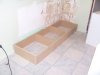
Oh! I had to go home early today..... 39 degrees to hot to paint, I got a little done this morning, then it got to hot for me and the paint. Anyway kitchen all scrubbed down (and it was disgusting), ceiling painted and I cut in the walls, It should be ready for all it's cabinets tomorrow - after I put them all together and make the base frame. Looking like a thurs/friday install.

My power tools are:

- Drop saw - for the floor boards / kictchen bases / quad / trims and other such wood.

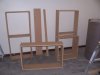
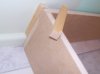
- router - I have a big one (makita) that I do not use much any more and a small edger (ozito) one this I use most now (love this one) - for trimming laminate, I make my own cabinet bases from pine and then cut and glue on S/Steel look laminate and then trim it up with the router. I have in the previous reno made an over head shelf cabinet for the kitchen from the old wardrobe, As it is difficult to cut melamine nice and clean with a circular saw, I cut it with the saw 5 mm greater and then pop on the straight edge and trim with the router. This gives you a nice clean cut edge.

jig saw black and decker- for cutting small jobs ie lattice to size / cutting out the holes for sinks - hot plates etc.

hammer drill (not cordless) - for all holes in brick work and wood. I find it has more power than the cordless therefore I need less strength.

cordless drill ( do not use this much) - hubby gave it to me when he updated his, I hardly use it.

electric screw driver bosch $60-70(I use this lots) my best buy - especially for putting together all the kit kitchens and wardrobes) its great for demo work, when dismantling cabinets / doors etc. Oh and all those scres etc people put in walls.

grinder makita- to cut off bolts / broken screws etc, cutting tiles.

sander black and decker - for the usual

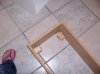
9inch circular saw - for those jobs I cannot get under the drop saw, like the big sheets of MDF I put on the kitchen floor to bring the levels up to match the bamboo.

A $50 Ozito spray gun. for fences etc.

Sorry forgot the photos....naughty me. tomorrow.

I will update all the brands of tools I have later. I am not sure I spelt them right!:confused:
 
Celeste....I'm gobsmacked! What an amazing woman you are. I wouldn't even know where to start using all those tools. How and when did you learn all this stuff?
 
Celeste:
Hi all


Is anyone really interested or am I talking to my self???
__________________

Absafriggin'lutely! mate...:)

I am hanging onto everything you do, my partner reads everything you do!! He and I both think you seriously rock.

I need to share my kudos around before I can cyberspace you more love but you are unreal, know that I am learning heaps ...you seem to have a really good way of getting thru explaining stuff. Don't give a rats about your spelling, we figure it out. :)

Sailor:
What an amazing woman you are

Totally agree, love your determination, independence, skill, sharing knowledge genes, I have you printed off and stored in your own folder:

*Knowledge: Celeste-way*

Thankyou
 
Hi guys

Some photos not many as tiling takes me a while.

Note, I haven't done the grouting yet, as I had skin missing off the top of my finger (from scooping out the excess adhesive - I hate gloves!) everything made it sting, so I have left it until it all heals. Also, I have been waiting for the glass man to come and measure for the screen. I have a feeling he will turn up the day I grout!!:eek: So, I will leave it until he's been.

photos 1 & 2 - The bathroom tiles are white with a ripple and splashes of silver. The floor tiles are a pale grey. The walls are dulux dalmation which is a white with a grey tonings, I matched it to the white of the tiles. I paint B4 I tile, so all I have to do is touchups and I do not have to worry about paint on the tiles.

photo 3 - This is the lounge room, I am still patching the wall (bottom right corner) where I removed a power point as all the brick and render had fallen out around it, the electrician will put a new one in on the good part of the wall when he finishes.

I needed to paint the left hand side of the window, because as soon as the carport goes up (on the out side of this wall) on thursday, hubby will come and install the split system, it will be mounted above or below the carport which ever is easiest on the outside and the internal bit will be on the wall just left of this window. Its easier to paint B4 things are added, saves the fiddly cutting in stuff. I've also painted part of the fence outside where the posts are going, saves time and effort.

So the left side is the new colour (taubmans dry sage) and the right is the old lime green!!!:eek:
 

Attachments

  • 100_1713.jpg
    100_1713.jpg
    48.1 KB · Views: 126
  • 100_1714.jpg
    100_1714.jpg
    95.4 KB · Views: 142
  • 100_1717.jpg
    100_1717.jpg
    72.3 KB · Views: 144
Here are some photos of the kitchen, It has had its 1st coat, one wall dry sage (sorry I said taubmans B4 its actually Solver) the lighter contrast is solver moyne. I patch and sand the obvious then do the 1st coat, then patch what is noticable after that. The 1st coat hides a lot of the smaller dents and scratches. This way you do less patching especially on 30yr old walls.

photo 1 - the darker wall continues into the lounge, same wall as lounge photo previous post. The sink will go in under the window and there will be a breakfast bar coming out from the wall where the chair is. I have started to put the cabinets together, I am getting faster 4 cabinets in 40min. excellant!!

I am putting in a white slim line venetian on the window and coffee coloured bamboo on the floor, white cabinets the bases will have white doors and the over heads, silver doors with glass. The bench tops will be crea style laminate that is dark slate grey granite look. The splash backs will be crea style laminate, brushed stainless steel with a little chrome dot (it so so cool this laminate I just had to find some where to use it.:cool:) It is only about 200-230mm high, basically from the bench top to the bottom edge of the window, continued all the way around. As yet I have not decided what to do behind the hotplate. I need to have a chat with the bench top maker. I will put a window sill in the kichen to hide where the tiles were removed.

Photo 2 - other side of the kitchen the extra patching is where I removed the tiles, as the splash back is only 200-230mm you will see the painted areas so I needed to patch them again to look really good. position of cabinets - from the left side fridge space, base cabinet with overhead, oven cabinet with canopy over, then another base cabinet with overhead.

In the lounge room I will be putting wood look venetian blinds to go with the coffee colour bamboo and the greens - sort of tropical look.

The Bamboo for this one is different from duplex 1. no 1 was horizonal light coloured (honey coloured) no.2 is vertical darker colour - coffee.
 

Attachments

  • 100_1715.jpg
    100_1715.jpg
    93.1 KB · Views: 140
  • 100_1716.jpg
    100_1716.jpg
    77.8 KB · Views: 120
Hi Guys

Well Today I will start the step by step kitchen install, my way.

1 = strip out old kitchen / tiles etc
2 = make a plan for new kitchen and buy cabinets etc.
3 = plumber to do any changes, I had the wall taps changed to a mixer
4 = electrician to disconnectold stove etc / put in any new power points / oven, hotplate, canopy etc connections.
5 = patch where the tradies haved been - you can buy ready made render for patching brick work at bunning just mix with water until its a little stiffer than tooth paste. for the plaster use "Final finish - by gyproc" it is a ready made plaster product that goes on really nicely and only needs to be sanded with a hand held sponge sander.
6 = sand and paint everything to be painted.
7 = I do not use the windup legs for my cabinets - they annoy me, I use a wooden frame, which is my 1st photo step by step.


Photo 1 - on this wall there will be 3 base cabinets, the middle one is for the oven and hotplate and 2 over heads with a canopy in between.

- the usual height for cabinet is 900mm
my bench tops will be 33mm = 900 - 33 = 867
cabinets are 700mm high = 867 - 700 = 167
I will be adding bamboo to the floor which brings the floor up
approx. 15-17mm = 167 + 15 = 182mm. I have rounded it down
and will make my bases 180mm high

- I use 16mm MDF for the bases, I purchases a sheet 1200 x 2400 x 16 and had mitre 10 cut it into 180mm strips.

- all 3 cabinets are 600mm wide x 700mm high x 580mm deep

- As I am not removing the tiles, I can not remove the skirting boards so I will work around them.

- the 3 base cabinets together give me a total length of 1800mm, width 580mm. 2 sides are seen and 2 are against the skirting boards/wall.

- the kick boards are usually 20mm in from the edge of the cabinet and due to the 20mm thickness of the skirt I will make the frame for these 3 cabinets 20mm smaller all round. total of frames 1760 x 540

- My MDF is in 1200mm lengths so I will be making 2 frames.
1 x 1180 x 540 - 2 strips of 1180 and 3 cross beams of 540 - 32mm = 508mm (= 2 x the thickness of the MDF)
1 x 580 x 540 - 2 strips of 540 and 2 cross beams of 508mm

photo 3 - plans for base frame / kick boards
photo 2 - the MDF cut to size ready to be made up

more following
 

Attachments

  • 100_1718.jpg
    100_1718.jpg
    65.7 KB · Views: 95
  • 100_1720.jpg
    100_1720.jpg
    72.6 KB · Views: 97
  • plans.JPG
    plans.JPG
    48.7 KB · Views: 107
photo 2 - the construction of the frame
- cut the MDF to the lengths needed
- the first join is the trickiest, I used the bin and some off cuts to hold the main piece at the right height whilst I attached the 1st cross peice.
- drill a pilot hole 1st then pop in a screw - I used 2 screws per join, use screws that are twice the thickness of the MDF I used 35mm self drilling and self counter sinking screws - you need to have the screw flush with the face of the wood.
- attach all cross pieces then turn it over and attach the other long piece.

photo 1 - 1st frame ready

photo 3 - All the frames for both sides finished - except the brakfast bar. I still need to finalise what and how I am doing this.

more next reply
 

Attachments

  • 100_1721.jpg
    100_1721.jpg
    80.7 KB · Views: 79
  • 100_1724.jpg
    100_1724.jpg
    79.5 KB · Views: 71
  • 100_1725.jpg
    100_1725.jpg
    96 KB · Views: 86
I used a drop saw (Ryobi) photo 1 - to cut the MDF is length - you could map it all up and get Bunnings / Mitre 10 to cut it all to size

When the frames are all complete I will cover the seen faces with Brushed S/Steel look laminate see photo 2 - I brought this large piece for about $200, this makes kitchen no.4 and I still have enough for another kitchen.

The tool I use to cut it is a laminate cutter see photo 3. more details next reply
 

Attachments

  • 100_1722.jpg
    100_1722.jpg
    74 KB · Views: 104
  • 100_1726.jpg
    100_1726.jpg
    77.2 KB · Views: 98
  • 100_1728.jpg
    100_1728.jpg
    84.9 KB · Views: 84
Photo 1 - showa you what I use as a straight edge - it's a piece of aliminium square tube. In this photo I have also already cut 1 piece of laminate.

You need to cut it deep enough to see the brown of the wood under the colour. Cut along the straight edge on the waste side. Not on the side of the strip you want as the cutter can slip and go off line.

You can if its a small piece pop it on a table and place the cut line on the edge of the table, with the colour face up and bend it over until you snap it. This piece is to big for a table so I pick up one end and try to fold it until it starts a small split, then put your foot on the large piece and just pull it up, it will rip all the way down. Photo 2 shows the strip being ripped off.

Note: there will be some jaggered backing on the strips, I trim them after I glue them on, which I will show you tomorrow. You can cut / trim it with sissors if neccessary.

I hope it all makes sense.
 

Attachments

  • 100_1729.jpg
    100_1729.jpg
    91 KB · Views: 97
  • 100_1730.jpg
    100_1730.jpg
    62.6 KB · Views: 96
Hi all

Ok, know ones talking to me again. A hello would be nice:(

OK kitchen kickboards/frames all in cabinets nearly all installed. One lot decided to be a Pain. I had to pull them all out and redo. You need to make sure the frame is really really level!! Should finish tomorrow (needed to pick up a door from IKEA to use as a back panel for the cabinet that backs into the lounge - part of the brakfast bar)

Carport went up friday, got the call last night patio changes all approved. It should go up 2nd week of december.

May have a buyer for no.1

Had a day off today. Feeling a bit tired!! Went to IKEA and had lunch out.:D

some more photos tomorrow.
 
You're an inspiration Celeste!
With the s/steel look laminate, what other use do you think it's suitable for? I saw someone had a s/steel splash back for a laundry, would this be possible as it sounds like it's easy to use.
I also love your tips too! Keep going!!!!
 
Hi guys

Here's some WIP photos

Photo 1 - 1st frame in position
photo 2 - I will have a gap above the skirt, so I cut a peice of scrap to fill it, then I glue it into place, B4 gluing on the laminate. I use wood adhesive, it's white and dries clear and sets fairly fast.
- after applying the S/Steel laminate I screwed the frame to the skirt, drill a pilot hole 1st and use 40mm wood screws. I put 1 either end and 2 equally spaced in the middle, no further than 600mm apart. this frame is 40mm short of 1800mm

photo 3 - this is the frame for the breakfast bar as I do not have a skirt or such to attach it to, I positioned it and then glues 2 blocks of wood to the floor and to the frame, to hold it in place. The part of the frame that is not attached to the wall or the other frame is less than 600mm long, if it was longer I would put in more block along then length.

Note, the Aussie safety boots in photo 3 - It's alright I was just about to go and had taken my safety boots off.!! Heee!!:D
 

Attachments

  • 100_1733.jpg
    100_1733.jpg
    68.5 KB · Views: 100
  • 100_1734.jpg
    100_1734.jpg
    64 KB · Views: 78
  • 100_1737.jpg
    100_1737.jpg
    67.5 KB · Views: 102
Back
Top